Best Picks for Patio Umbrellas

Spring into Summer with a new patio umbrella to keep cool

Spring is in full bloom, and the weather is beginning to warm. As we move through spring and into summer, expect temperatures to hit all-time highs. When you need a break from the heat, a patio umbrella, like the Tucci umbrella, is the absolute must-have for supreme outdoor living. The right umbrella provides an abundance of shade while also adding a splash of style to your backyard.

Aside from appearances, there are several factors to consider when selecting the right patio umbrella for your outdoor needs. The size, material of the canopy, the umbrella’s foundation, and operating mechanism are all factors to consider before investing. 

Initial Considerations

When it comes to selecting the best patio umbrella for your space, there are several factors to consider. Determine the size you need first. The size of your umbrella will determine the type of base you’ll need to keep it stable in different weather conditions. Umbrellas range in size from five feet in diameter to fifteen feet or more. Ask yourself, “What will my umbrella provide shade for in my outdoor area?”

Next, decide which umbrella style is best for your space and lifestyle. Street umbrellas, cantilever umbrellas, rectangular umbrellas, and umbrellas with lights are the popular styles to consider. Think about all the features that matter to you, as you might find several styles that offer all you are looking for and more.

You’ll need a few accessories once you’ve decided on the size and design of your patio umbrella. Most outdoor umbrellas do not have bases, so you’ll have to purchase one separately. You’ll want to secure your investment with an umbrella cover if your outdoor space gets a lot of direct sunlight or excessive rain. Weather-resistant umbrella covers usually have zippers or Velcro for added protection and only cover the fabric umbrella (not the stand or base). Covers range in price from $15 to $75, making them a worthy addition to your umbrella purchase.

Types of Umbrellas

There are two main types of umbrellas to choose from.

Market Models: This is a traditional upright patio umbrella. Market umbrellas are the most popular patio umbrella design on the market. Most models have a vented canopy, which allows a slight breeze to pass through without raising the umbrella off the ground. They feature a central stand that connects to the canopy through several support bars. A tilt feature is available on some market umbrellas, allowing you to change the frame’s upper portion to keep the shade focused precisely where you want it. Market umbrellas are a perfect way to provide shade for a patio table, outdoor kitchen, or small seating area. 

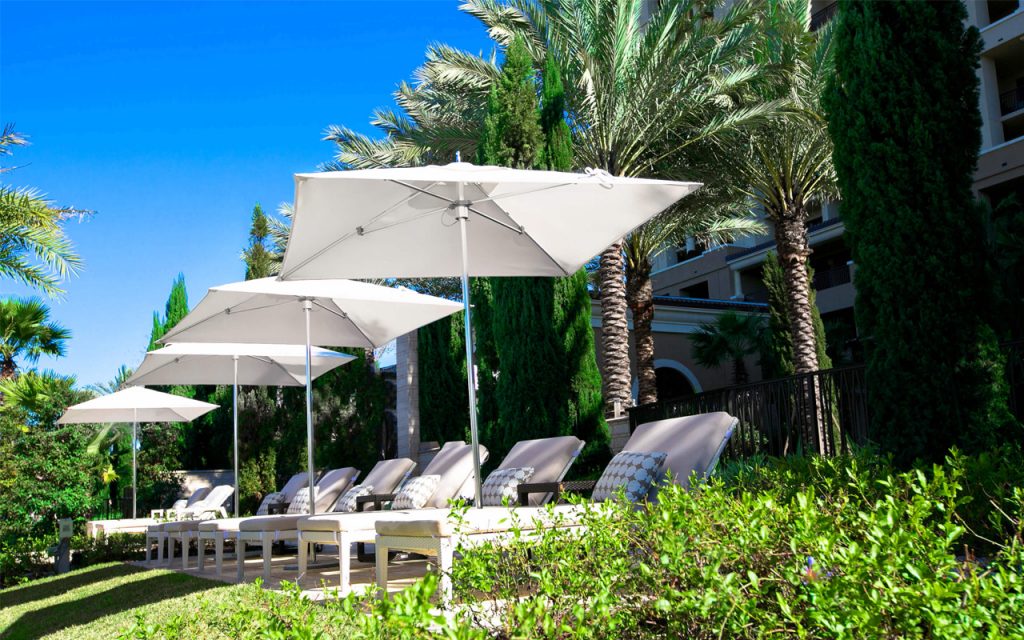
Cantilever: Also known as “offset umbrellas,” these models have a canopy offset from the base by an arching frame. This feature means the umbrella base won’t get in the way of your deck chairs or entertaining outdoor area. When the sun moves from east to west, a tilted model helps keep the shadow from being cast. The arched design of these umbrellas makes them suitable for open spaces. The canopy will loom directly over the seating area if the stand is off to the side.

Of these types, there are two distinctive features that further separate umbrella models.

Lift: There are three different types of lifts: manual, pulley, and crank. When selecting a lift method, think about how much you’ll need to take the umbrella down. Manual lift patio umbrellas, for example, take more effort to work than a pulley, while crank lift umbrellas are the simplest to use.

Tilt: Patio umbrellas with tilt options adapt to the sun’s angle during the day for more versatility. If you’re constantly shifting your chair to escape the heat, the tilt option on your umbrella is just what you need. Tilting the canopy is simple and can be achieved using the following methods: collar and auto, manual, rotational, or push. All of these strategies take minimal effort for the user.

These umbrellas mostly come in one of two variants.

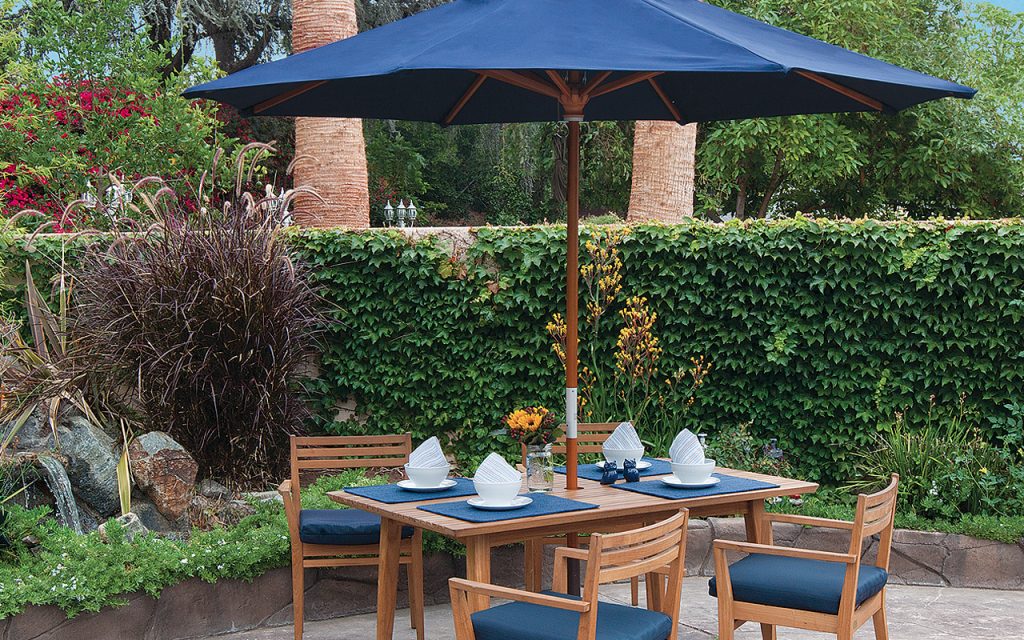
Table: Table umbrellas are models that are meant to run through the middle of a table. Some tables have them built-in as one unit, though most aren’t to allow flexibility and ease with which to replace your umbrella.

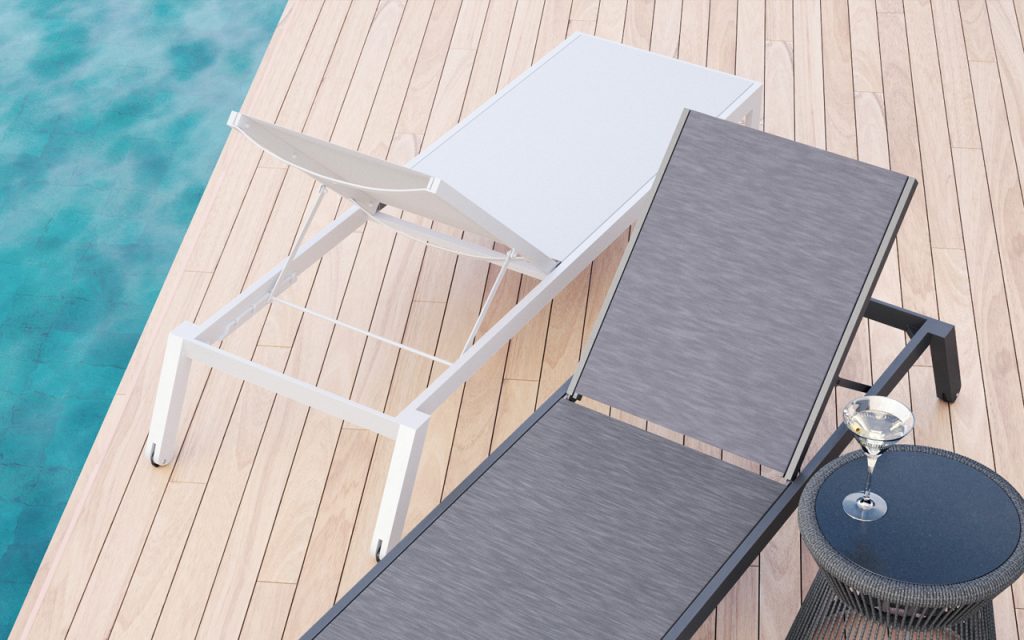
Freestanding: A freestanding design might be better if you want your umbrella to provide shade on a different part of your patio, such as over poolside lounge chairs. It’s also possible that you don’t want a pole to obstruct your patio table. With freestanding umbrellas, you can use a table entirely for food preparation or gameplay.

Umbrella Size

The size of a patio umbrella is one of the most important considerations when purchasing one. If it’s too tall, it’ll look bulky and out of place; it won’t provide enough shade if it’s too small. The amount of shade your area will get is determined by the size of your umbrella. Consider how much shade you’d like and how much room you have. It won’t look or feel good to clutter your patio with an overly large umbrella.

It’s important to note that umbrella dimensions apply to the canopy’s width when wholly extended, not the height. Although umbrella widths vary, the height should be no less than seven feet and no more than nine feet when completely raised. The recommendations below will assist you in choosing the right umbrella for your needs.

  • A 5-foot to 6-foot umbrella provides the perfect cover for a bistro set with two chairs.
  • If you want to shade a 36-inch table with two to four chairs, you’ll need a 7-foot umbrella.
  • Are you looking to shade a 40-inch table with four to six chairs or a small conversation area? A 7.5-foot to 8.5-foot umbrella is your best bet.
  • For tables up to 48 inches or small-to-medium conversation areas, you’ll need a 9-foot to 10-foot umbrella.
  • An 11-foot umbrella is suitable for a 60-inch table with six chairs or a medium-sized conversation area.
  • For an extensive conversation area or a 60-to-72-inch table, choose an umbrella that’s 11.5 to 13-feet across.

Your umbrella pole’s height is also critical; you want it to be high enough to be out of the way but not so high that it loses its purpose. Eight-foot-tall poles are the most popular, but there are other choices. Consider the height of your head. A minimum of 7-foot umbrellas is recommended. If necessary, extend the table width by an additional 2 feet on each side. For example, if you have a 4-foot round table, look for an umbrella with an 8-foot diameter.

Umbrella Materials

The best way to pick an umbrella is to match your exterior aesthetics or complement the furniture your umbrella would be covering.

Construction Materials: Aluminum, wood, and fiberglass are the three most popular materials for umbrella frames.

  • Aluminum umbrella frames are the most common choice because they are the least costly, withstand a wide range of weather conditions, bend enough to withstand moderate winds, and are lightweight.
  • Teak and other hardwoods make lovely frames that look particularly good on a wooden deck. While treated to prevent rot and weather damage, outdoor wood tends to fade or change color over time and is more likely than metal to snap in high winds.
  • The most expensive choice is fiberglass, but it is also the most durable. This solid, lightweight material will not rust or weather, and it will perform well even in high winds. If you live in a windy place, consider a fiberglass style rather than an aluminum one.

Fabrics: Choose a fabric that can withstand the elements. The umbrella’s fabric must be strong enough to withstand the heat, rain, wind, and cold. Sunbrella, a standard fabric used by many manufacturers, is one of the most popular. This durable acrylic fabric is available in a wide variety of colors and patterns and can withstand almost any environmental condition without fading. Polyester, canvas, unbranded acrylic, and Olefin are all durable materials that can be used outside. Please pay careful attention to the umbrella’s fabric, as it must be weather-resistant to both heavy sun and rain.

Bases and Stands

Even if the umbrella is centered through your patio table, it takes a heavy base to prevent it from falling over or flying away. Failure to protect your umbrella increases the likelihood of it being destroyed, as well as the risk of injury.

Umbrella bases are mostly made of stone, iron, or concrete, but some less costly bases are hollow plastic that must be filled with sand or water. Some umbrella bases have small wheels, which come in handy if you need to drive your umbrella around.

The heavier the base, the bigger the umbrella, and cantilever models require much more weight than market variants. Some umbrellas come with a foundation, while others require you to buy one separately. For reference:

  • 40 pounds for 5-to-6-foot umbrellas
  • 50 pounds for 7.5-to-8.5-foot umbrellas
  • 60 pounds for 9-foot umbrellas
  • 70 pounds for 10-foot umbrellas
  • 100 pounds for 11-to13-foot umbrellas

An appropriate umbrella base is required; don’t be fooled into thinking that securing it to a table would suffice. Umbrella bases not only help keep umbrellas straight in strong winds, but they also help keep them straight in sunny weather.

Look for the biggest base you can find for umbrellas larger than 10 feet. Make sure the base is made to match your umbrella’s pole. To get the best fit, speak directly to your umbrella manufacturer.

Go here to shop for elite treasure garden umbrellas

Replacement Slings for Your Patio Chairs

Tackle this DIY project as you prepare for Summer

As we get ready for summer, it’s an excellent time to consider upgrading to luxury patio furniture brands sold by All American Outdoor Living. But if you have a sling-back chair that has seen better days, you can use this DIY guide to save you money and refresh your chairs.

1. Remove the old plastic end caps on the patio sling rail

First and foremost, you need to disassemble your patio sling chair to install the new sling fabric. Remove the plastic end caps (plastic covers over the sling rails) from both ends of the sling rails with a flat head screwdriver or pliers. When removing your old end caps, be careful because they are often dry, brittle, and easy to crack. Take care not to damage them (you’ll need to remove them from both ends of the sling rails). Matching plastic caps can be difficult to locate depending on the manufacturer and color of your frames.

2. Remove the old sling material and spreader bars

It can be challenging to get the slings out of the rails at times. If the old slings are very old and have spent a lot of time in the sun, the plastic splines will be very brittle and rigid and will possibly break in chunks when you attempt to slide the old sling out of the rail. You’ll find that the new slings and splines are a breeze to install, particularly when compared to removing the old ones.

Remove each side of the old sling by slitting the fabric in the center. Cutting the old patio sling down the middle with a kitchen knife or heavy-duty scissors is the best way to get rid of it. Unbolt both sling rails before continuing if you don’t want to break your old slings by cutting them in half. The spreader bars, which are metal bars placed between the sling posts, must also be removed.

The sling sometimes becomes wedged inside the sling rail. Break the sling free by moving it back inside the sling rail with both hands. The fabric and plastic sling rod have been wedged up to the top of the rail opening due to the body’s weight lying on the old patio sling fabric.

This occurrence, combined with dirt and debris, gives the sling fabric’s edge the appearance of being glued in place. Spray some watered-down dish soap along the entire length of the sling rail to help loosen the sling and cloth. Allow the soapy mixture to work its magic for a few minutes. It takes some time to soak into the rail and dissolve the dirt and oils attached to the cloth.

There’s no need to preserve the sling rod or spline made out of plastic. As part of the kit, your new patio chair slings should come with a new supple sling rod. It’s doubtful that you’ll be able to reuse your old sling spline because it’s too dry and brittle. Re-threading the spline into the sewn rod pocket of your new replacement slings might be challenging.

The rusty, filthy fabric can easily slip out the sling rail’s bottom end. Grasp the sling with your hands or pliers and pull it away from the sling rail. Someone can keep the patio sling chair in place while someone else removes the old fabric from the rail.

If the old patio sling fabric is stubborn and won’t come free from the sling rail, use a flat head screwdriver to pry it loose. With the flat end of the screwdriver, force the patio sling fabric into the sling rail.

3. Remove the bolts from the rails

The plastic rod or spline threaded through the rod pockets on your new patio sling is held in place by the sling rails, which also support the edges of the new patio sling fabric. Bolts can secure one or both of the sling rails to the patio sling chair frame’s main body. The bolts are threaded into the chair frame via the sling rail. Remove all bolts (usually 4-6) from the patio chair frame with the required method.

Spray the bolts with a penetrating oil if they’re proving difficult to extract (Liquid Wrench, NAPA 6300). The oil would loosen any rust or corrosion on the bolt. Allow at least an hour for the oil to soak before continuing. Bolts and other hardware should be saved for reinstallation. It’s a safe idea to repair the bolts if they’re bent or rusted.

The bolt should not be forced out of the frame. You run the risk of snapping the bolts and potentially stripping out the threaded inserts, requiring additional frame repairs.

4. Take measurements for the new sling

To measure for new slings, take the width measurement while the old slings are still on, and measure the two rails from outside channel to outside channel (click for example) to the nearest 1/4″. The length of the old sling may generally be removed. We seldom use the width calculation by just measuring old slings after they’ve been replaced because we’ve noticed that the old slings are usually stretched or broken, and if new slings are the same width as the removed sling, they’re too loose. When ordering slings, always specify the width first, followed by the weight (width” x length”).

4. Insert the Sling Spline or Plastic Sling Rod

The new splines must first be mounted in the new slings’ side hems that fit into the sling rails. Feed the spline from one end, and it should feed all the way through. The new replacement slings are usually shipped without the plastic sling rod or sling spline installed.

Insert the sling spline into each side of the sling. The sling spline will be longer than necessary; do not trim away the excess until later in the installation process. If you are having trouble inserting the sling spline, try sharpening the end in a pencil sharpener. Insert the pencil into the opposite end of the sling or the end you are pushing toward. The pencil or pen will be pushed out in the future by the sling spline and not caught on the inner hem.

6. Replace sling fabric and spline into the sling rails

Ensure the rails are in the same place as when they were removed before slipping the sling into the rail. Slide the fabric through the sling rails, keeping the tag at the top of the chair to separate the top from the sling’s bottom.

Place one side of the sling into one of the sling rails (but not both) — then remove the sling rail entirely from the chair frame after the sling is mounted on one side — then install the new sling into the other sling rail that is still on the chair frame. 

Last but not least, reattach the loose sling rail to the chair frame. By carefully gripping the ends of the fabric near the ends of the sling rail and gently tugging as you tighten the sling rail to the edge, you can progressively draw the material close to the ends of the sling rails.

7. Reinstall the bolts

Attach the sling rails to the chair frame with the newly mounted sling. Line up the holes and tighten all of the bolts with your fingers. Do not tighten the bolts all the way. You want to work your way around the chair and tighten each bolt a little bit at a time so the bolts tighten into the sling rails at the same rate. Do not fully tighten the bolts at this time. 

Pull the sling until it is even with both sling rails, starting at the bottom of the chair. Tighten just the two bottom bolts until the sling is flush with BOTH sling rails. This action will hold the sling’s bottom in place and secure.

8. Stretch the sling material

Stretch the fabric upward to remove any wrinkles left in the bend of the seat. To stretch and pull the material through the sling rails, use a pair of pliers. Take care not to tear the fabric by of your sling chaise lounge by pulling too hard.

Since the fabric tends to slip back down the sling rail, it may be beneficial to use a pair of clamps to keep it in place. If you don’t have clamps, having someone to assist you with this move might be beneficial. Place your back against the chair. Stretch the sling upward to the edge of the sling rail with pliers until both the fabric and the sling rail are even. Using clamps or having someone keep the sling in place while you tighten the remaining bolts is a good idea at this stage. The sling should now be snug and wrinkle-free.

9. Reinstall the spreader bars

Installing a new sling and reassembling a chair is not difficult, but reinstalling the spreader bars can be challenging at times.

The spreader bar aims to hold the sling fabric taut. Spreader bars must be reinstalled if your chair came with them. Turn your chair sideways, taking care not to scratch the handles. Try bending the spreader bar just enough over your knee to allow it to fit into position. If you cannot turn the spreader bar, a spreader tool will be needed to spread the slings rails apart, allowing room for the spreader bar.

To avoid wrinkles in the fabric where the sling rails bend more sharply, the slings must also be extended in length. Pull at the sling ends nearest to the sling rail with the vise grips clamped on the thread (loosen the sling rail from the frame). Take extra caution here, as ripping the fabric is very easy if you pull too hard. Even the manufacturer has been known to tear the new sling during this phase, forcing them to discard it and try again with a new sling, so be extremely cautious. A few wrinkles won’t damage the fabric or its work, but a ripped sling can be incredibly inconvenient.

10. Trim excess spline and reinstall the end caps

Cut all excess sling spline with scissors, utility knife, or cutting, pliers, then gently tap end caps back onto sling rails with a rubber mallet. 

Voila! You have successfully replaced your patio chair slings in time for the warm months ahead.